
Configuring authentication in Azure Static Web Apps
Azure Static Web Apps is a fantastic Azure hosting service designed for full-stack (sometimes called static) applications. Among the various features offered is built-in authentication for Azure Active Directory (AAD), GitHub and Twitter. No additional actions or configurations are required to use these providers; they’re available out of the box!
To support this, three routes are added to every static web app - /.auth/login/aad, /.auth/login/github and /.auth/login/twitter for AAD, GitHub and Twitter respectively. By hiding these routes you can disable certain providers, or alias them for a cleaner URL.
Additionally, /.auth/logout is provided to allow a user to logout, and /.auth/me is added as an endpoint for client-side code to retrieve information about the user.
Let’s walk through a scenario where you only want one provider (let’s say Twitter), a cleaner path of /login for allowing users to authenticate, and to disable the other two providers. This will allow us to explore how to configure and interact with the authentication system provided by Azure Static Web Apps.
Obtain the starter code
You can absolutely walk through the steps below on your own static web app if you’re already using one. If you don’t, you can use the starter provided. This sample uses vanilla JavaScript and HTML to allow us to focus on the auth portions outside of a framework.
- Use the template generate your own repository
- Open a command or terminal window and execute the following code to clone the repository locally and open it in Visual Studio code
git clone <PATH TO THE REPOSITORY>
code .
Routing and provider selection
Let’s focus on the first two goals for our scenario - disabling GitHub and AAD authentication, and ensuring /login is configured for Twitter authentication. This is done by configuring routes, which is an array inside staticwebapp.config.json. The routes section is used to setup server-side routes.
The three key properties we want are route, statusCode and rewrite. The route property is the path the route will trigger for. statusCode allows us to configure a particular status code; by setting the routes for GitHub and AAD authentication to 404 we can disable those providers. rewrite allows us to redirect calls to a particular path to a different one; this will allow us to ensure login points to /.auth/login/twitter.
Note: staticwebapp.config.json is run on the server-side, so when we set the routes to the providers we wish to disable to 404 we prevent access to them.
- In the root of the application create a new file named staticwebapp.config.json (or use the existing one if you already have a project).
- Add the following JSON to disable AAD and GitHub authentication, and point login to Twitter authentication.
{
    "routes": [
        {
            "route": "/.auth/login/aad",
            "statusCode": 404
        },
        {
            "route": "/.auth/login/github",
            "statusCode": 404
        },
        {
            "route": "/login",
            "rewrite": "/.auth/login/twitter"
        }
    ]
}
Accessing user information
As highlighted earlier, an endpoint is added to every static web app to /.auth/me, which returns the status of the current user. If the user is authenticated, clientPrincipal in the returned JSON object will contain information about the user. If the user has not authenticated (is anonymous), clientPrincipal will return null. We can call this like any endpoint by using fetch.
Let’s add the JavaScript to retrieve the status of the user.
- At the top of index.js, add the following function to retrieve the username, which is stored in the property named
userDetails.
async function getUsername() {
    // call the endpoint
    const response = await fetch('/.auth/me');
    // convert to JSON
    const json = await response.json();
    // ensure clientPrincipal and userDetails exist
    if(json.clientPrincipal && json.clientPrincipal.userDetails) {
        // return userDetails (the username)
        return json.clientPrincipal.userDetails;
    } else {
        // return null if anonymous
        return null;
    }
}
Deploy your site
Let’s deploy the site! Add your updates and push them to GitHub by executing the following commands in a Visual Studio Code terminal (which you can access by selecting Terminal > New Terminal):
git add .
git commit -m "Configured authentication"
git push
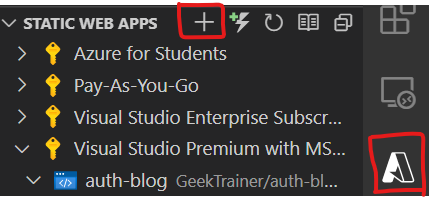
Let’s deploy the project to Azure Static Web Apps by using the Azure Static Web Apps extension.
- Select the Azure icon in your workbench.
- Authenticate to Azure if needed
- Click the
+to create a new static web app.
The wizard will start, asking for the following information:
- Azure subscription: Choose the subscription you wish to use
- Name of your site: Enter the name of your site
- Location of your application code: /
- Location if your build output: <Remove build and leave blank >
Your application will now be deployed!
Your site will be added inside the Static Web Apps extension. You can expand Production and Actions to track the state of the deployment (you may need to refresh the output by right-clicking on Actions and selecting Refresh).
See your site in action
Once the deployment completes (indicated by a check mark) you’ll likely be presented with a dialog to browse to your site; if not you can browse to the site by right-clicking on Production and selecting Browse site.

After opening in the browser, you’ll see the link which says Login to see the site. When you select the link, you’ll be redirected to the login page for Azure Static Web Apps and Twitter. Once you grant consent, you’ll be redirected back to the main page, where your Twitter handle and the logout link will be displayed.
Recap and next steps
Congratulations! You successfully setup authentication in Azure Static Web Apps! From here, you can use routes to set allowed roles to control page access.